Showing posts with label Sheltering Tree. Show all posts

Saturday, November 28, 2015

Scripture Saturday - Bible Journaling - Psalm 118v14

Hi Stamping Friends!!

Psalm 118:14
"The Lord is my strength and my song; he has become my salvation."


Stamps: Sheltering Tree, Layered Letters Alphabet, Sophisticated Serifs, Back to Basics Alphabet, Rotary Alphabet Stamp
Ink: Cucumber Crush, Daffodil Delight, Watermelon Wonder, Chocolate Chip, Bermuda Bay

I had such a hard time choosing a verse this week. There were so many great ones to choose from!!! I'm loving the Thanksgiving 30 Day Scripture Writing Plan. I can't wait to see December's!!

I chose this verse because I've been studying Revelation at BSF this year and last week we studied about worshiping God. Many of the verses we read talked about singing praise to Him. I love how in this verse it says the Lord is my song. He is my praise. He is deserves all of my worship. And when I thinking of singing, I think of birds. That is why I stamped the little red bird up in the tree.

I stamped all my words and images and then sponged some Bermuda Bay ink around it all to add some "sky". Then I thought it looked kind of plain so I added some washi tape. It still seemed like it needed something else so I stamped a "cloud" up in the corner. BIG mistake. I should have left well enough alone. So I just covered it up with more washi tape. :)

I did take one "before" photo...

Even if this page has a "mistake", I still enjoyed making it and am glad that I now have this verse tucked in my heart. It's amazing how memorization is just a natural outcome of spending extra time considering the words of verse.

Thanks for stopping by!!
Have a blessed day!!
Krystal

Monday, April 6, 2015

Stampin' Up! Sheltering Tree Challenges + FREE SHIPPING!!

Hey Stampin' Friends!!


I hope you had a wonderful Easter yesterday. We had a fun, full weekend. The college boy and a friend came and turned my living room into a dorm room (and I LOVED it!). My brother, his wife, and their three adorable daughters came for a too short visit on Saturday afternoon. We enjoyed a beautiful Easter service Sunday morning and then topped it all off with a delicious salmon dinner shared with our neighbor that evening. The best way to enjoy Resurrection Sunday is to share it!!

Lots of fun stuff to blog about today!! First, here is a card I created that is perfect for two online challenges. The Just Add Ink #257 Inspiration Photo Challenge JAI257 and the Pals Paper Arts #246 Color Challenge PPA246.


Stamps: Sheltering Tree
Ink: Crisp Cantaloupe, Baked Brown Sugar, Calypso Coral
Paper: Baked Brown Sugar, Crisp Cantaloupe, Pistachio Pudding, Whisper White
Accessories: Spring Flowers EF, Circle Framelits, Paper Doily, Coral Seam Binding, Pearl Jewels

I LOVE this color combination. I am going to be so sad when the 2013-2015 In-Colors are retired in June. I've really grown find of them. My favorite is Crisp Cantaloupe. I just can't get enough of it! And it pairs so well with Calypso Coral.

Here are the two challenge inspirations:


If you want to stock up on these In-Colors before they are gone, this week is a great time to do it because Stampin' Up! is offering FREE SHIPPING!!!


Stay tuned for details about my next Online Stamp Class:


Thanks for stopping by!
STAMP SOMETHING!!
Krystal


Thursday, April 2, 2015

Stampin' Up! Sheltering Tree Winter and Spring

Hey Stamping Friends!!!

Welcome back to the final two "four seasons" cards from my March Online Stamp Class featuring the Sheltering Tree and Hardwood stamp sets. Today I will be sharing the winter and spring cards:

WINTER:

Stamps: Sheltering Tree
Paper: Whisper White, Soft Sky, Silver Glimmer
Accessories: Oval Framelits, Decorative Dots EF, Small Heart Punch, Silver Ribbon, Dazzling Details, Mica Flakes (retired)


Kit Includes:
One Whisper White card base
One Soft Sky embossed card front with oval cut-out
One Silver Glimmer oval frame
One Whisper White stamping piece
One Window Sheet
One Whisper White strip
One Silver Glimmer heart punch
One Silver Ribbon
Mica Flakes

After I designed and put together this card, I decided it would have been the perfect shaker card. So I included all the supplies needed to make it a shaker card in the card kits. I will give instructions with a shaker card in mind.

First, glue the Silver Glimmer frame to the Soft Sky embossed card front. Making frames is super easy using the Framelits. Just "stack" them inside each other and run them through the Big Shot.


Next, stamp your tree trunk image using Going Gray or Smoky Slate ink (I can't remember what I used!) or any gray ink you have. Then using Soft Sky ink, stamp a few "snowflakes" around your tree and also the "snow" under your tree. If you have Dazzling Details, you can add them now so that they will be completely dry before adhering this piece to your card.


Stamp your sentiment onto the Whisper White strip using Going Gray ink. Cut the words apart. 


If you are making a shaker card, attach your window sheet to the backside of the Soft Sky card front. Surround the back of oval cut-out with Dimensionals. Place some of the Mica Flakes on your stamped image. Then, looking through the oval cut-out, place your card front onto your image (you want to be sure your tree image is centered in the oval). If none of this makes any sense, visit my Shaker Card Tutorial blog post for more instructions.

Finally, attach the card front onto the card base. Attach your sentiment and Silver Glimmer heart using Dimensionals and tie your ribbon around the top.

Stamping Tip: When using Framelits and embossing on the same sheet of card stock, make sure you cut out your shape first and emboss second. If you emboss first and cut-out second, you could flatten out the embossed parts when you run your card stock through your Big Shot the second time.


SPRING:


Stamps: Sheltering Tree
Paper: Blushing Bride, Crumb Cake, Whisper White
Accessories: Circle Framelits, Paper Doily, Organza Ribbon, Artisan Embellishment Roses, Pearl Jewels, Woodgrain EF


Kit Includes:
One Blushing Bride card base
One Crumb Cake embossed card front
One half Paper Doily
One Blushing Bride circle
One Whisper White circle
One Whisper White strip
Three Ribbon Roses
One Organza Ribbon piece
Ten Pearl Jewels


Using Baked Brown Sugar ink, stamp your tree trunk onto to the Whisper White circle. Using Blushing Bride ink (or any soft pink color ink), stamp the "leaves" onto the tree image. Stamp a second time without re-inking your stamp. When stamping the second time, move your stamp slightly either up or down or left or right. Do not stamp directly over top of the first stamped image. The idea is to give your tree more "blooms" of a lighter color. Again using Blushing Bride ink, stamp the "ground". Glue the Whisper White circle onto the Blushing Bride circle and then layer on top of the Paper Doily.

Using Dmensionals, attach the completed circle onto the Crumb Cake embossed card front. Using your scissors, remove any part of the circle that hangs over the edge. Glue your Crumb Cake embossed card front onto the Blushing Bride card base.

Using your piercing tool, attach the tiny pearl jewels to your "blooms". (You can't see them in the photo, but they are there.)

Using Baked Brown Sugar ink, stamp your sentiment onto the Whisper White tag. Trim if necessary. Attach to card using Dimensionals.  Cut apart your ribbon roses. Attach to card front using Glue Dots. Tie your Organza ribbon to the top.

This card reminds me of the Central Valley in spring when all of the almond orchards bloom. There was one orchard that had three different varieties in it and each section was a different shade of pink, from light to dark. It was the prettiest thing when it was in bloom.


If you've visited my blog often, you will notice that I almost always tie a ribbon around my cards. It just doesn't feel quite finished unless it has a ribbon tied around it. Almost like it's a gift. I consider it my "signature". It's not a Krystal card unless it has a ribbon. ;)

Anywhoo, I hope you enjoyed my Four Seasons card kit. If you would like to join my next Online Card Class, stop by next Tuesday when I will be announcing the next class.

To stay connected with all my Stampin' Up! announcements, follow me:


INSTAGRAM: krystals_cards

Thanks for stopping by!
STAMP SOMETHING!
Krystal


Wednesday, April 1, 2015

Stampin' Up! Sheltering Tree Summer and Fall

Hey Stamping Friends!!!

I finally got myself up in the craft loft to get the March Sheltering Tree card kits together. I think this has been one of my most favorite kits so far!! I decided to do one card for each of the four seasons. Today I will share the summer and fall cards.

SUMMER:


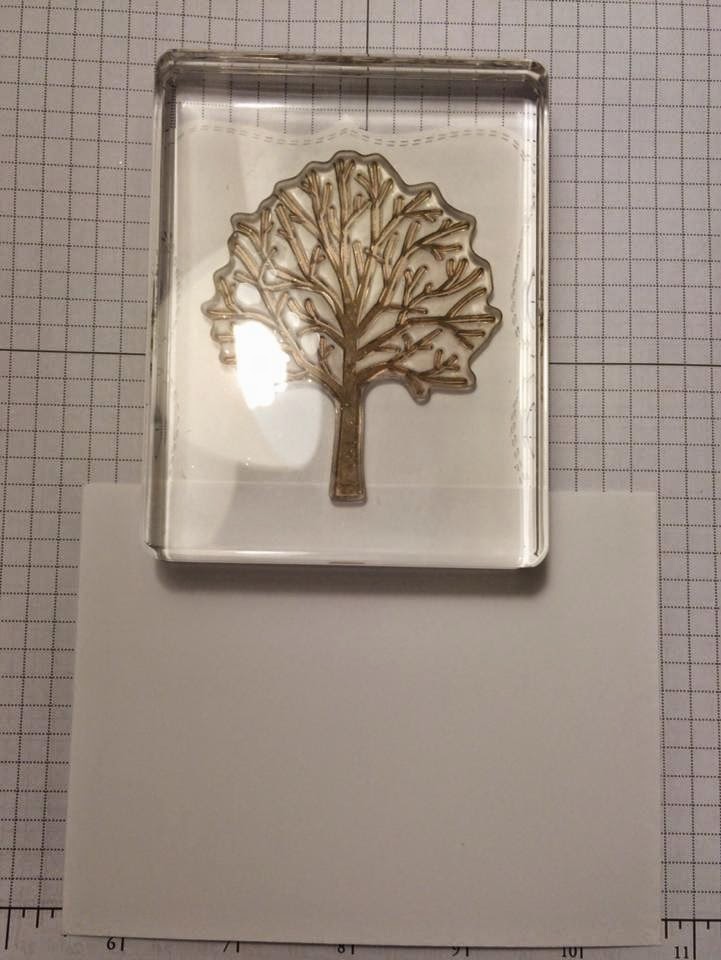
Stamps: Sheltering Tree (Occasions Mini Catalog), Hardwood BG
Paper: Daffodil Delight, Crumb Cake, Whisper White, Wild Wasabi DSP
Accessories: Top Note die, Daffodil Seam Binding


Kit Includes:
One Daffodil Delight card base
One Crumb Cake card front
One Whisper White Top Note die-cut
One Wild Wasabi Top Note piece
One Whisper White strip
One Daffodil Delight Seam Binding piece

Instructions:

Using your Hardwood BG stamp with Baked Brown Sugar ink (or any lighter brown ink like Soft Suede or Crumb Cake) stamp onto the Crumb Cake card front. Adhere the card front to the Daffodil card base. 

Adhere the Wild Wasabi piece onto the bottom of the Whisper White Top Note cutout. Using an extra piece of any card stock you have on hand, cover up the Wild Wasabi DSP while you stamp your tree and flower stem images.


I used Baked Brown Sugar ink to stamp my tree trunk and Wild Wasabi ink to stamp my flower stems. Stamp as many flower stems as you would like. After stamping the trunk and stems, you can remove the cover piece of card stock. 

I used Wild Wasabi ink to stamp the "leaves" on the tree. I inked up my image once, and then stamped it twice. Moving it slightly up the second time, to get more leaves, but with a slightly lighter hue. After stamping the leaves, add your daffodil flowers using Daffodil Delight ink or any yellow ink you already have. If you position you flower stamp just so, it will perfectly line up with the stems. You may want to practice on your grid paper first. Stamp the swing using Early Espresso.

Stamp your sentiment on the Whisper White strip using Baked Brown Sugar ink. Adhere to the bottom of your Crumb Cake card front. Remember... if you mess up while stamping anything, you can always turn it over and try again. :)

Adhere you Top Note tree image using Dimensionals. Tie your Daffodil Delight seam binding. First card DONE!!

FALL:

Stamps: Sheltering Tree, Hardwood BG
Paper: Cajun Craze, Crumb Cake, Very Vanilla, Hello Honey
Accessories: Woodgrain EF, Twill Ribbon, Deco Label Framelits, Gold Baker's Twine, Button (retired)


Kit Includes:
One Cajun Craze card base
One Crumb Cake card front
One Very Vanilla Deco Label cut-out
One Cajun Craze embossed piece
One Hello Honey sentiment tag
One Twill Ribbon piece
One Gold Baker's Twine piece
One button

Using Baked Brown Sugar ink, stamp your Hardwood BG stamp onto the Crumb Cake card front. Adhere it to the Cajun Craze card base. Glue the Cajun Craze embossed piece to your card front, leaving enough room on the left side for your ribbon.

Using Baked Brown Sugar ink, stamp the tree trunk image to the left of center on your Very Vanilla Deco Label cut-out. Using Hello Honey Ink (or Crushed Curry) stamp "leaves" on your tree (do this only once, not twice like the top card). Also use your Hello Honey ink to stamp the "swoosh" (for lack of a better description) under your tree. 

Using Cajun Craze ink (or any rusty color you have) use the "flower" image (the one you used on the top card to make the daffodils) to add a few leaves to your tree and also under your tree. Use Early Espresso ink to stamp the rake. Stamp your sentiment using Baked Brown Sugar ink.

Using Dimensionals, adhere your stamped tree image onto the embossed Cajun Craze piece. Attach your sentiment using a Dimensional at one end (the end that will touch the Crumb Cake card front) and a Glue Dot at the other end (the end that will be on your tree image).

Tie the Baker's Twine through the button into a bow. Trim off any excess. Adhere button with a Glue Dot. Tie Twill ribbon. DONE!!!

I hope you all enjoy making your cards as much as I did!!!

PS... Both of these cards were inspired by cards that I saw on the web. True confession: I'm a CASEr!! :)

For more stamping fun, follow me on:


Instagram: krystals_cards

Thanks for stopping by!
STAMP SOMETHING!
Krystal

Friday, March 20, 2015

Stampin' Up! Celebrate Today Shaker Card Tutorial

Hi Stamping Friends!!

Whenever I send out my monthly Online Stamp Class card kits, I always try to include a special thank you card. Last month for the Celebrate Today class, I made a shaker card. My very first attempt at making a shaker card EVER in the 9 years I've been a Stampin' Up! demonstrator. What has taken me so long? They are so fun!!


Stamps: Lots of Thanks
Paper: Calypso Coral, Coastal Cabana, Gold Glimmer, Best Year Ever DSP (SAB)
Accessories: Balloon Framelits, Itty Bitty Star Punch, Project Life Label Framelits, Gold Sequin Trim, Gold Baker's Twine, Gold EP, Dimensionals. Lots and lots of Dimensionals!


Here are a few pictures to help explain just how easy it is... 

First I cut out the balloon shape using the Balloon Framelits that coordinate with the Celebrate Today stamp set (page 11 of the Occasions Catalog). Then I cut out a piece of Window Sheet (page 192) that was larger than the cutout. Using Fast Fuse adhesive (because it's extra sticky and super strong) adhere the square of Window Sheet to the backside of your balloon cutout. Like this:


Next, using a bazillion Dimensionals, frame your cutout:


If I remember correctly, I think it took 21 Dimensionals to surround the balloon cutout. You do not want to leave any gaps between them. You want to place them as close as possible so none of your "confetti" will fall out. Stampin' Up! does sell Shaker Frames that are pre-cut circles of Dimensional material (page 205), but they were too small to fit around the balloon cutout. Thus I improvised and it turned out great!

I used the Gold Sequin Trim to fill my balloon. Just slide the individual sequins off of the strings. 


I probably used around 60 individual sequins for each card (Yes. I counted. OCD much?). You could also use thick, chunky glitter or small paper punches. The Confetti Heart Border Punch (page 5) or the Confetti Stars Border Punch (page 45) featured in the Occasions Catalog would work perfect for this project. Which means I guess I need to order them. ;)


After filling your cutout with "confetti", remove the backs off of the Dimensionals and adhere whatever Designer Series Paper or card stock you want to show through your cutout. I used a piece of the Best Year Ever DSP from the Sale-A-Bration promotion (find out how you can het it FREE through March 31st!)

To adhere your shaker to your card base, simply place more Dimensionals (didn't I say you needed lots and LOTS of Dimensionals?!) around the edges of your card front and adhere it to the base. BOOM! You now have a shaker card!

Here are all of my pieces before I assembled my cards:


My shaker card fronts are ready to be adhered to the card bases. NOTE: If you plan on doing any stamping on your shaker fronts, make sure you do that BEFORE you add any Dimensionals to the back. It's really awkward to try and stamp on cardstock that is not completely flat.

See how easy that was? I hope you won't wait nine years to try it like I did!!


REMEMBER!!!! Today is the LAST DAY you can join my Sheltering Tree March Online Stamp Class:


From now through March 20th, purchase the Sheltering Tree stamp set AND the Hardwood Background stamp from my Stampin' Up! website using the Hostess Code: PM2XM9RC and receive a FREE card kit from me featuring both stamp sets.

Sheltering Tree on page 22 of the Occasions Catalog
#137163 $24.95

Hardwood Background on page 175 of the "Big" Catalog
#133035 $13.95

If you already have either of these stamp sets, then simply place a qualifying order of any products of your choice in the amount of $38.90 from my Stampin' Up! website using the Hostess Code: PM2XM9RC by March 20th and you can still receive the FREE card kit.

Here are the four cards in the kit that will you will receive FREE with a qualifying purchase: 


For more Sheltering Tree inspiration, visit my Pinterest board: STAMPIN' UP! SHELTERING TREE

For up-to-the-minute stamping fun and announcements, like my page on Facebook: KRYSTAL'S CARDS - STAMPIN UP DEMONSTRATOR - OCEANSIDE

And I'm now on Instagram!! krystals_cards. Search for me!!

Thanks so much for stopping by.
I hope you have a fabulous Friday!
STAMP SOMETHING!
Krystal


Thursday, March 19, 2015

Stampin' Up! Happenings Simply Created Thank You

Hi Stamping Friends!!!

Wanted to pop in and share the thank you cards we sent this month. I needed about 35 of them. Usually I find a design I like on the web and then replicate it. But this month I "cheated" a little. Instead of making all 35, I made 15 using one of Stampin' Up!'s Card Kits called Happenings. And I was so happy with the results that I wished I had another kit in the house!!!


I love how they turned out!! And they went together so quickly since all the parts and pieces are cut and ready. I did add a few little "extras" to each card. On the top card I added the arrows. On the middle card I added the embossed Pistachio circle. And on the last card I added the butterfly for an extra "pop" of color.

Making and sending these monthly thank you cards is such a wonderful privilege. I am constantly amazed and overwhelmed by God's provision for our family. Without the prayers, help, and support from so many loving and generous people, we would not be able to accomplish these things God has put on our hearts here in Oceanside. I'm so glad that my "hobby" helps me share my heart with those who have touched my life.

The Happenings Simply Created Card Kit is featured on page 198 of the catalog. The kit includes 15 of each:
white notecards with envelopes
designer series background paper
die-cut accents
silver glitter banners
white banners
silver baker's twine
silver buttons

I chose the "thank you" sentiment but you could choose any sentiment you want. You could add a cupcake and make them birthday cards. Add a flower accent and use them for "thinking of you" or a wedding/bridal shower. With these soft, pretty colors you could even use them for baby cards. So many options!!!

I love that Stampin' Up! makes stamping fun, creative, and convenient!! And at only $14.95 for the kit, they are also a great deal! Make sure you add them to your next purchase and keep them lying around for when you need that quick, last minute card. You can thank me later. ;)

And if you love card kits, you should join my March Online Stamp Class:


From now through March 20th, purchase the Sheltering Tree stamp set AND the Hardwood Background stamp from my Stampin' Up! website using the Hostess Code: PM2XM9RC and receive a FREE card kit from me featuring both stamp sets.

Sheltering Tree on page 22 of the Occasions Catalog
#137163 $24.95

Hardwood Background on page 175 of the "Big" Catalog
#133035 $13.95

If you already have either of these stamp sets, then simply place a qualifying order of any products of your choice in the amount of $38.90 from my Stampin' Up! website using the Hostess Code: PM2XM9RC by March 20th and you can still receive the FREE card kit.


Stampin' Up had TONS of announcements the last few days that I've skipped blogging. I can't remember which ones I've already shared with you so if I repeat myself, just pretend you are listening to your mother and shake your head and smile. :)

BLENDABILITIES PRODUCT LINE HAS BEEN DISCONTINUED:
A number of you have experienced quality issues with the Blendabilities product line, which has resulted in frustration. Due to the nature of the defect, we have concluded that difficulties, dissatisfaction, and product returns will only become more widespread. The manufacturer is unable to correct the problem in a manner that we are certain would meet our high quality standards and provide us with a stable, long-term solution. Therefore, after a great deal of deliberation and in order to prevent further disappointment, the Blendabilities product line has been discontinued.

MDS WILL BE UNAVAILABLE AFTER MAY 31, 2015:
After careful evaluation and consideration, Stampin’ Up! has determined that we will no longer offer MDS or its associated professional print services.

NEW SALE-A-BRATIONS ITEMS WHILE SUPPLIES LAST:


AND FINALLY...
NEW WEEKLY DEALS:

Whew!! That's a lot of information!! And I have a feeling there is more to come as one of our updates mentioned that "major changes" were coming to Stampin' Up! I don't know what that means, but I say BRING IT ON!! I love when they change things up a bit. Keeps it fresh and new.


Don't forget to check me out on other social media sites. My favorite hangout is FACEBOOK: KRYSTAL'S CARDS - STAMPIN' UP OCEANSIDE

And my second favorite is PINTEREST: KRYSTAL'S CARDS

And I just recently joined the INSTAGRAM family. Look for me: krystals_cards

Well. I think that's finally it!!
Thanks for stopping by!
STAMP SOMETHING!
Krystal


Monday, March 9, 2015

UPDATE!! March Online Stamp Class - Sheltering Tree Stampin' Up!

Hi Stamping Friends!!

Because the Butterfly Bascis bundle is currently not orderable, I've changed my March Online Stamp Class to the Sheltering Tree stamp set.


Stamps: Sheltering Tree
Paper: Baked Brown Sugar, Pistachio Pudding, Whisper White
Ink: Baked Brown Sugar, Pistachio Pudding, Mossy Meadow
Accessories: Decorative Dots EF, Burlap Ribbon, Twine (retired)

This card was CASEd from one done by Wendy Weixler. Mine is a little simpler. I was trying to keep it more masculine looking.

I love the Burlap Ribbon, but sometimes it's too large for what I need. For this card I just used my scissors to trim it thinner.


Here are the details of my March Online Stamp Class featuring the Sheltering Tree stamp set:


From now through March 20th, purchase the Sheltering Tree stamp set AND the Hardwood Background stamp from my Stampin' Up! website using the Hostess Code: PM2XM9RC and receive a FREE card kit from me featuring both stamp sets.

Sheltering Tree on page 22 of the Occasions Catalog
#137163 $24.95

Hardwood Background on page 175 of the "Big" Catalog
#133035 $13.95

If you already have either of these stamp sets, then simply place a qualifying order of any products of your choice in the amount of $38.90 from my Stampin' Up! website using the Hostess Code: PM2XM9RC by March 20th and you can still receive the FREE card kit.

I'm really excited to design the cards for this class!! If you would like to see sneak peeks of my stamping projects, then make sure you "like" my Stampin' Up! Facebook page:

To see lots of other Sheltering Tree inspiration, visit my Pinterest board:

And I finally caved and started an Instagram account. Look for me:
krystals_cards


I would love to connect with you no matter what's your favorite form of social media!!!

If you have any questions about the March Online Stamp Class or any stamping topic, just email me: krystalscards(at)sbcglobal(dot)net.

Thanks for stopping by!
STAMP SOMETHING!!
Krystal