Showing posts with label Butterfly Basics. Show all posts

Friday, June 5, 2015

Stampin' Up! Butterfly Bundle May Online Stamp Class Garden Green

Hey Stampin' Friends!!

Today is the fifth and final card kit from my May Online Stamp Class featuring the Butterfly Bundle.

Happy Birthday


Stamps: Butterfly Basics
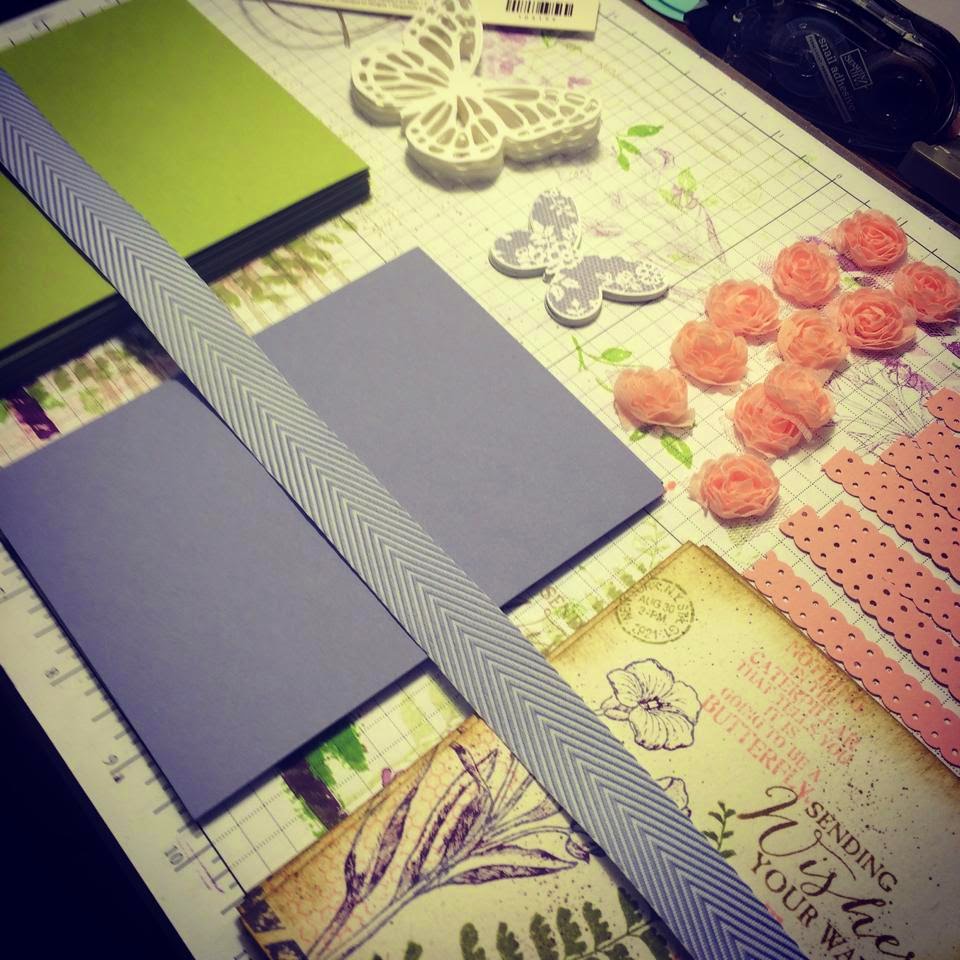
Paper: Garden Green, Typeset DSP, Calypso Coral, Very Vanilla
Ink: Garden Green, Calypso Coral, Crisp Cantaloupe
Accessories: Butterflies Thinlits, Bitty Butterfly Punch, Calypso Ribbon (SAB), Antique Brads
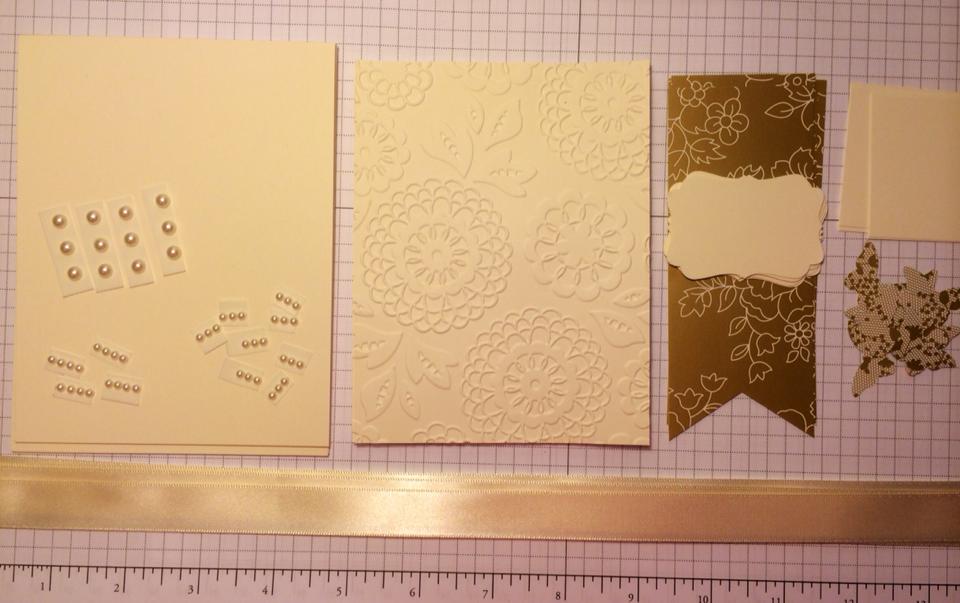
Kit Includes:

1 - Garden Green card base
1 - Typeset DSP card front
1 - Very Vanilla stamping sheet
1 - Very Vanilla strip
1 - Calypso Coral piece
1 - Calypso Coral ribbon
1 - Antique Brad

Instructions:

This is card is very self-explanatory. It is a "collage" style card so feel free to stamp the background however you like.
I used Garden Green ink with the fern image, Calypso Coral ink with the postage image and sentiment, and Crisp Cantaloupe ink for the butterfly images and the honeycomb image. If you do not have Crisp Cantaloupe ink you could exchange it for Blushing Bride.
After cutting out your butterflies, attach them to the card using Dimensionals for depth.

I hope you enjoyed making your card kits as much as I enjoyed creating them!!

If you would like to have FREE card kits sent to your mailbox, consider joining one of my Online Classes. My June Online Stamp Class will be featuring the Sprinkles of Life stamp set and matching Tree Builder Punch.


Here are the details:

It's so easy to join.

Simply go to my Stampin' Up! website:
before June 21 and 
purchase the Sprinkles of Life stamp set (#139971) on page 189 
AND the Tree Builder punch (#138295) on page 167 
using the Hostess Code: Y3WNGDHH 
and I will mail you 4 FREE card kits featuring these fabulous Stampin' Up! products.

For every Sprinkles of Life stamp set that is sold, Stampin' Up! will donate $3 to the Ronald McDonald House Charities. So you can join my online class, get an adorable stamp set AND make a difference! That sounds like a WIN-WIN to me!

(FYI... My July Online Class will feature the Tin of Cards and matching stamp set on page 110, so don't add it to your order just yet!!) ;)

Thanks so much for stopping by!
Remember to send a card.
Share the fun... Stamp something!
Krystal


Thursday, June 4, 2015

Stampin' Up! Butterfly Bundle Calypso Soiree

Hi Stampin' Friends!!!

Today I am sharing two more of the Butterfly Bundle card kits I sent to my May Online Stamp Class. I had so much fun creating cards with this stamp set and matching Framelits!

Sending Wishes Your Way


Stamps: Butterfly Basics
Paper: Calypso Coral, Whisper White, Crisp Cantaloupe, Gold Soiree DSP, Gold Foil, Vellum
Ink: Crisp Cantaloupe, Pistachio Pudding
Accessories: Deco Labels Framelits, Butterflies Thinlits, Bitty Butterfly Punch, Circle Framelits, Large Polka Dots EF, Perfect Polka Dots EF, Large Oval Punch, Gold Ribbon, Rhinestone Jewels

Kit Includes:

1 - Calypso Coral card base
1 - Whisper White embossed card front
1 - Crisp Cantaloupe Deco Label
1 - Gold Soiree circle
1 - Gold Foil piece
1 - Whisper White oval
1 - Whiper White piece for stamping
1 - Vellum embossed butterfly
1 - Gold ribbon
3 - Rhinestone jewels

Instructions:
Adhere the Whisper White embossed card front to the Calypso Coral card base. I used Liquid Glue.
Adhere the Gold Soiree circle to the Crisp Cantaloupe label. Attach to card front using Dimensionals.
Cut out the Gold Foil butterfly using your Framelits. Attach the vellum butterfly to the gold butterfly. I used Glue Dots.
Attach large Gold butterfly to the Gold Soiree circle using Dimensionals.
Stamp the small butterfly onto Whisper White cardstock using Pistachio Pudding ink. Other ink colors you could use: Garden Green, Calypso Coral, or Tangerine Tango.
Punch out small butterfly with the Bitty Butterfly punch. Add three Rhinestones. 
Attach small butterfly on top of the vellum butterfly using Dimensionals.
Stamp sentiment onto Whisper White oval using Crisp Cantaloupe ink. Other ink colors you could use: Calypso Coral, Garden Green, Gold Metallic, or Tangerine Tango.
Attach sentiment oval to card front using Dimensionals.
Tie Gold ribbon around top of card.
D O N E !!! :)


Happy Birthday Butterfly


Stamps: Butterfly Basics
Paper: Whisper White, Gold Soiree DSP, Sheer Perfection Vellum (SAB)
Ink: Calypso Coral
Accessories: Butterflies Thinlits, Calypso Chevron Ribbon, Bitty Butterfly Punch, Rhinestone Jewels


Kit Includes:

1 - Whisper White card base
1 - Gold Soiree card front
1 - Whisper White card front
1 - Sheer Perfection Vellum strip
1 - Gold Soiree strip
1 - Gold Soiree Bitty Butterfly
1 - Calypso Chevron Ribbon
3 - Rhinestone Jewels

Instructions:

Attach the Gold Soiree card front onto the Whisper White card base.
Using your Butterflies Thinlits, cut out the butterfly with the Whisper White card front, keeping the butterfly close to the top. Remember to "wrap" your cardstock in wax paper and laying your Thinlit on top of the cardstock/wax paper layers.
(I know this is not the Butterflies Thinlits, but you get the picture right?)
Stamp the Happy Birthday sentiment on the bottom of the Whisper White card front using Calypso Coral ink. You could also use Tangerine Tango or Tangelo Twist ink.
Attach the Whisper White card front to the Gold Soiree card front.
Attach the Gold Soiree strip onto the Whisper White card front between the sentiment and the butterfly cutout.
Attach the Sheer Perfection vellum strip on top of the Gold Soiree strip using Glue Dots. I only used two Glue Dots at both ends of the strip.
Attach the Whisper White butterfly you cut out earlier to the open space using Dimensionals.
Attach the 3 Rhinestones to the Bitty Gold Soiree butterfly. Attach the Bitty Butterfly to the larger Whisper White butterfly using Dimensionals.
Tie Chevron Ribbon to card.
D O N E !!!

If you would like to join one of my Online Stamp Classes and receive card kits in the mail for FREE, I've started my June Online Class featuring the Sprinkles of Life stamp set and matching Tree Builder punch.


Check out this post on my blog for all the details:

Tomorrow I will be sharing the fifth and final card from my Butterfly Bundle Online Card Class. Hope you will visit again!

Thanks for stopping by!
Share the fun... Stamp Something!
Krystal

Wednesday, June 3, 2015

Stampin' Up! Butterfly Bundle Vanilla and Gold

Hi Stampin' Friends!!

Today I will be showing the first two of five cards I created for my May Online Stamp Class featuring the Butterfly Bundle. I'm so glad this set made it into the new catalog. It's so beautiful.

Sending Wishes Your Way


Stamps: Butterfly Basics
Paper: Very Vanilla, Gold Soiree DSP
Ink: Metallic Gold
Accessories: Banner Triple Punch, Butterflies Thinlits, Bitty Butterfly punch, Lovely Lace EF, Decorative Label punch, Pearl Jewels, Vanilla Satin Ribbon

Kit Includes:

1 - Very Vanilla card base
1 - Very Vanilla card front embossed with the Lovely Lace EF
1 - Gold Soiree banner
1 - Very Vanilla Decorative Label punch
1 - Very Vanilla piece for stamping butterfly image
2 - Gold Soiree Bitty Butterfly punches
1 - Very Vanilla Satin Ribbon
Various Pearls

Instructions:
Stamp the lacey butterfly image onto the Very Vanilla cardstock using Metallic Gold ink. If you do not have Metallic Gold ink, you could use Crumb Cake ink in it's place. Or you could add any color ink that fits the occasion. Let dry and then cut-out using the matching Thinlit. 
Stamp the "Sending wishes your way" sentiment onto the Vanilla Label using Metallic Gold ink. Set aside to dry. Remember, if you mess up your stamping, you can always flip it over and try again on the other side. :)
Attach your embossed vanilla card front onto your card base using Dimensionals.
Glue the gold banner onto the card front.
Attach butterflies and sentiment using Dimensionals.
Add pearls and ribbon.

A simple, yet very elegant card that would be perfect for an anniversary, wedding or special birthday.


There Is Nothing In The Caterpillar...


Stamps: Butterfly Basics
Paper: Very Vanilla, Brushed Gold, Basic Gray, Gold Soiree DSP, Sheer Perfection Vellum (SAB)
Ink: Metallic Gold, Basic Gray
Accessories: Butterflies Thinlits, Scallop Circle Punch, 2" Circle Punch, God Satin Ribbon, Pearl Jewels

Kits Includes:

1 - Very Vanilla card base
1 - Brushed Gold card front
1 - Gold Soiree card front
1 - Sheer Perfection Vellum piece
1 - Basic Gray cardstock piece
1 - Brushed Gold scallop circle
1 - Very Vanilla 2" circle
5 - Pearl jewels
1 - Gold satin ribbon

Instructions:
Stamp the flower image onto the Vanilla circle using Metallic Gold ink. If you do not have Metallic Gold, you can use Crumb Cake ink.
Stamp the "caterpillar" sentiment over top of the flower image using Basic Gray ink. If you do not have Basic Gray ink you can substitute with Basic Black ink. Set aside to dry.
Attach Brushed Gold bard front onto the Very Vanilla card base. Attach the Gold Soiree to the Brushed Gold.
Using glue dots (one at the top and one at the bottom), attach the Sheer Perfection Vellum to the left side of your card.
Cut out your Basic Gray butterfly using your Thinlits. (Remember to "wrap" your cardstock in wax paper before cutting.)
Attach you circle sentiment to the Brushed Gold scallop circle.
Attach the butterfly and sentiment to your card using Dimensionals.
Add pearls to your butterfly.
Tie your ribbon.

Now you have two beautiful cards all ready for you next elegant occasion!!

Come back tomorrow for the next two Butterfly Bundle cards.

If you love what you see, you should join one of my Online Stamp Classes. For the month of June I am featuring the Sprinkles of Life stamp set and matching Tree Builder punch.


Thanks for stopping by!
Share the fun... Stamp Something!!
Krystal


Wednesday, May 13, 2015

Stampin' Up! Butterfly Basics Class

Hey Stampin' Friends!!

There is still time to join my May Online Stamp Class featuring the Butterfly Basics Bundle. Here is a card I made with this set:


Stamps: Butterfly Basics
Paper: Crushed Curry, Whisper White, Flowerpot DSP
Ink: Crushed Curry, Calypso Coral, Garden Green, Blushing Bride
Accessories: Butterfly Thinlits, Bitty Butterfly Punch, Blushing Bride Chevron Ribbon, Candy Dots

I mailed this card with my April Online Card Kits as a "thank you". (And maybe also as a little hint to entice them for May's Online Class!) ;)  

Here are the details for my May Class:


Order the Butterfly Bundle
Photopolymer 138865 $41.50
from now through May 18
using Hostess Code: FCJ6AZTH
and I will send you a FREE card kit with 5 (yes FIVE!) unique cards featuring the Butterfly Basics stamp set and matching Butterflies Thinlits.

If you already have the stamp set but would still like to receive the FREE card kit from me, then all you need to do is place a qualifying order of $41.50 using the Hostess Code: FCJ6AZTH from now through May 18 and I will mail you the kit as well.

You could also "share" the class with a friend. You or your friend order the bundle. Then the other person makes a qualifying purchase of $41.50 (remember to use the Hostess Code!) of any products. Then you can get together and stamp your FREE card kits together when you receive them. Now how fun would that be?!

Here is a little sneak peek of one of the cards that will be included in the kit:


I will continue to post peeks of the cards on my FB page and on my IG account throughout the week. Are you following me yet? You should!!

Don't forget to check out "The List" and order your retiring products before they are gone. I got me a collection of Chevron Ribbon. I have a small obsession with ribbon. I {heart} it all!!

I hope you are having a wonderful week!
Thanks for stopping by.
Stamp Something!
Krystal

Friday, April 24, 2015

Stampin' Up! Basic Butterfly Swap CASE

Hi Stamping Friends!!

Tomorrow I will be participating in my first ever card swap and I'm pretty excited!! I've never actually attended any type of crafting event where there was a swap. So even though I've been a Stampin' Up! demonstrator for almost 10 years, I'm still a newbie at some things. ;)


Stamps: Butterfly Basics
Paper: Pear Pizzazz, Wisteria Wonder, Naturals, Whisper White, Blushing Bride
Ink: Pear Pizzazz, Wisteria Wonder, Blushing Bride, Baked Brown Sugar, Blackberry Bliss marker
Accessories: Butterflies Thinlits, Wisteria Chevron Ribbon, Artisan Embellishment Kit (ribbon rose), Dotted Scallop Border punch, Linen Thread, Dimensionals

I CASEd this card from one I saw on the internet. And this was my prototype card. Which means I still made some changes before I made all 10 of my swaps. I eliminated most of the Blackberry Bliss and replaced it with Wisteria Wonder. I also did not include the smaller butterfly. Not major changes, but card making is always a process for me. I may look at a card for a week and still tweak it a bit before I am satisfied.

There is a lot of stamping on this card. I did it all in steps. Here are a couple of pictures:


In order to get the sentiment in the right location, I had to stamp my flower and fern image first.

On the flower, I inked the image up with Wisteria Wonder and then colored a few spots on the stamp with the Blackberry Bliss marker before I stamped it. Giving it a kind of two-tone effect.


Here is all the stamps and ink I used to create this card:


I designed this card before "The List" came out, but there are a few retirement items on it: Dotted Scallop Border Punch, Wisteria Wonder Chevron Ribbon, Blushing Bride card stock. Make sure you order everything you want from "The List" early as quantities are limited.

Here is all my parts and pieces ready for assembling:


You can see in this picture that I changes the butterfly from Blackberry to Wisteria. I wanted him to match the ribbon better. I could have chosen to change the ribbon color, but I just LOVE the chevron ribbon. I'm hoping to order some more. It's 50% off so I better hurry!

Here are all 10 cards all most finished. Just need ribbons and butterflies:


I'm looking forward to tomorrow's crafting event. It is a fundraiser for the Vista Pregnancy Resource Center. I just have NO idea what I am going to make for 12 whole hours!!

I made a little Stampin' Up! donation gift basket for a door prize. It had three stamps sets, a pack of 12x12 DSP, Rhinestones, Dimensionals, Ribbons, Buttons, cards made by me, and a few other odds and ends:


I hope the recipient enjoys it!!

Don't forget that today is THE LAST DAY to join my April Painted Petals Online Stamp Class:


You can find out all of the details on this post: PAINTED PETALS APRIL ONLINE CLASS

And don't forget to place your Last Chance List order ASAP:


And if you've already joined my April Online Class, but want to order some retiring products, you can combine that with my May Butterfly Bundle Class:


Visit this post for more details: BUTTERFLY BUNDLE MAY ONLINE CLASS

And as always... Make sure you go "like" my Facebook page. It's where I hang out most often and where you can find out the latest Stampin' Up! news and information first. And we just have a lot of fun together!!


Thanks for stopping by!
Stamp something!
Krystal


Tuesday, March 3, 2015

March 2015 Online Stamp Class - Butterfly Basics Bundle

Hi Stamping Friends!!

Can you believe it's March already?! We've had some beautiful spring rains the last few days here in North County and today is a glorious, sunny day. A new month means a new Online Stamp Class. This month I will be featuring the Butterfly Basics Bundle.


Order the Butterfly Basics Bundle #138865 featured on page 26 of the Occasions Catalog at my Stampin' Up! website using the Hostess Code: PM2XM9RC between now and March 20th and I will send you a FREE card kit featuring the Butterfly Basics stamp set and matching Butterflies Thinlits Dies.

If you have already purchased the Butterfly Basics Bundle you can still join the class and receive the card kit for FREE. Just place a qualifying order for a minimum amount of $41.50 at my Stampin' Up! website using the Hostess Code: PM2XM9RC during the above dates and I will mail you the FREE Butterfly Basics card kit.


Don't forget that Sale-A-Bration promotion is still going on. Spend $50 and receive FREE Stampin' Up! products!! And Stampin' Up! has added four BRAND NEW Sale-A-Bration products for the month of March!!!


I love the For Being You stamp set. But that vellum is so beautiful. Not sure what I should pick first!!

To view more amazing ideas using the Butterfly Basics stamp set and matching Thinlits dies, visit my Pinterest board:

For lots of stamping fun and tips, "like" my Stampin' Up! Facebook page:

Thanks for stopping by!
Stamp something!
Krystal


Monday, February 9, 2015

Creative Crew Blog Hop

Hi Stamping Friends!!

Last week I was nominated by a sweet Stampin' Up! demo friend, Cindy, from Heart's Delight Cards to participate in the Creative Crew blog hop. You can see her post HERE. The Creative Crew is a group of Stampin' Up demonstrators that encourages each others creativity through monthly challenges. They have an SU! demos only forum at Splitcoast Stampers. But the Stampin' Up! gallery is open for everyone to visit.

Enough about that. On to the hop!! The Creative Crew Blog Hop has a few simple rules: 
1. I have to create a project exclusively for the hop.
2. I have to answer a few questions.
3. I get to nominate two other stampers that I admire. (I only chose one).
Super easy!!

Here is my card:

Stamps: Butterfly Basics, Thoughts and Prayers
Ink: Crushed Curry, Calypso Coral, Coastal Cabana, Sahara Sand
Paper: Coastal Cabana, Calypso Coral, Whisper White, Beat Year Ever DSP (SAB)
Accessories: Calypso Chevron Ribbon, Coastal Cabana Ribbon (SAB), Butterflies Thinlits, Bitty Butterfly Punch, Curly Label Punch, Zig Zag EF, Basic Pearl Jewels, Dimensionals
Tips: The squares of DSP are 1.25" squares, glued to a piece of Whisper White card stock, cut to size and then embossed.

I created this card for a dear friend who had emergency surgery for a stroke last Thursday. She's a trooper and was moved out of ICU yesterday. Praying for you Shannon!!!

Here are my answers to the questions:

1. What are you working on?
I have a class next Sunday using the Petal Potpourri and Crazy About You stamp sets, so I am currently putting all the card kits together for that and I have a workshop next Saturday that I need to figure out a make-and-take for. I am also creating my monthly Thank You cards for our family's ministry. And I'm planning my next online stamp class using the Celebrate Today stamp set and matching Framelits. Plus I need to finish my Hello Life and Perpetual Birthday Calendar Project Kits to share at my classes. I have a TON of stamping stuff to do this week and I LOVE it!!! :)

2. How does your work differ from others in your genre?
I'm not exactly sure what this questions means, (as I'm not all that original) but I'm guessing it asking about my style. My style is pretty clean and simple. I prefer bright colors and easy designs. I do not do a lot of fussy or messy techniques. Even though I love those types of cards, I just can't seem to pull it off. My cards tend to be very symmetrical. I do like to challenge myself once in awhile. 

3. Why do you create what you do?
I tend to create mostly cards and occasionally treat holders. I create them mostly for classes. Before we moved I had a monthly stamp club that I created projects for once a month. Since we moved, I have started online monthly stamp classes that I design card kits for. I'm hoping to find some local stampers. I miss stamping with friends!! I also stamp and send monthly Thank You cards for our ministry supporters. I really love sending handmade cards. I hope it conveys how appreciative we truly are. I also "create" simply because I enjoy it and it makes me happy. :)

4. How does your creative process work?
I have been a "CASEr" since I started stamping. Meaning I pretty much copy everything I make. I do make adjustments for color and paper and stamp sets, but I get all my beginning ideas from things I've seen on the internet. Pinterest is one of my best stamping friends. That's one thing I LOVE about the Stampin' Up! community, demonstrators are always willing to share everything they do. And I greatly appreciate that. 

I didn't know who to nominate because I have been out of the blog hop loop for quite some time. So I posted a request to fellow SU! demos at Splitcoast Stampers and Jess very graciously agreed to keep the hop going. She will be posting a card next week Monday on her blog: Jess B... Creative "Card"iology. Make sure you stop by and visit her next week Monday to see what she has created.

If you would like to see more of my creative process and what I'm up to in my stamping loft, join me on Facebook at Krystal's Cards - Oceanside. I like to post pics as I'm creating. It makes me feel like I'm stamping with friends. :)

Thanks for stopping by!
Stamp something!
Krystal