Showing posts with label Painted Petals. Show all posts

Wednesday, May 6, 2015

Stampin' Up! Painted Petals Delightful Wonder

Hey Stampin' Friends!!

Today I have the last two cards from my Painted Petals April Online Stamp Class to share with you.


Stamps: Painted Petals
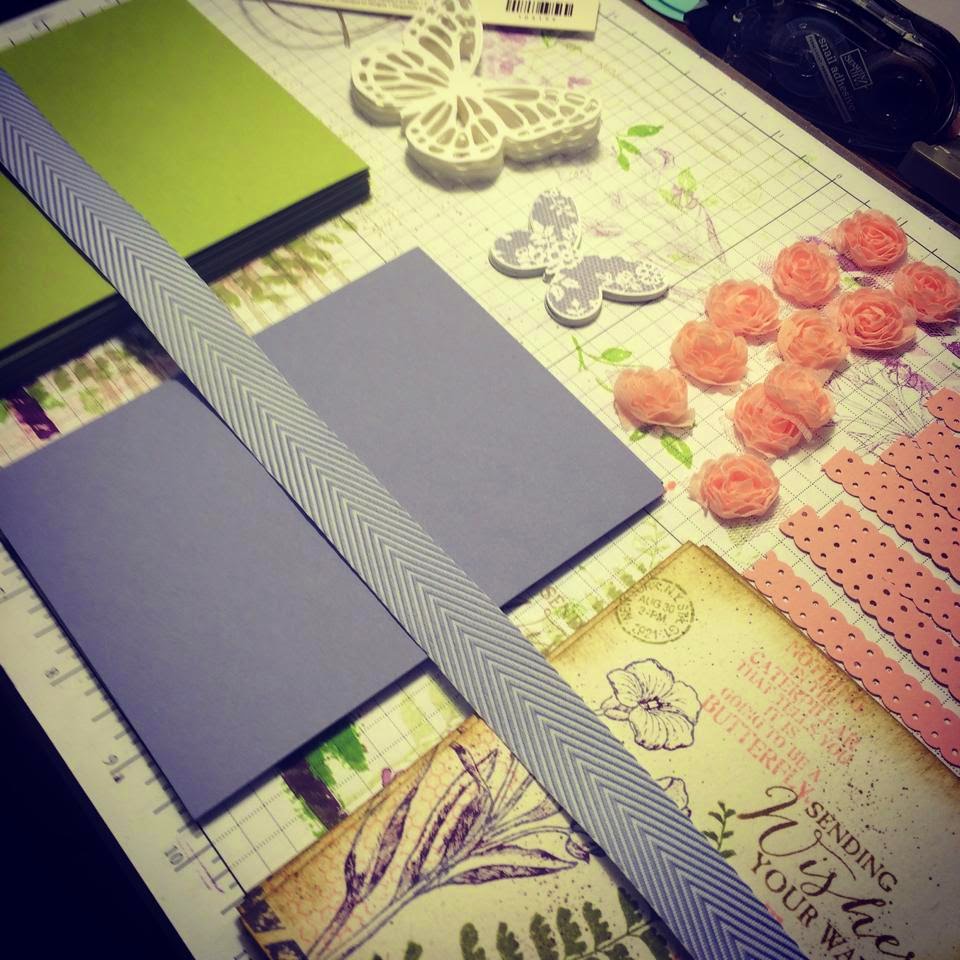
Paper: Wisteria Wonder, Whisper White, Daffodil Delight
Ink: Wild Wasabi, Daffodil Delight, Wisteria Wonder
Accessories: On Film Framelits, Wisteria Chevron Ribbon, Wasabi Twine, Butterfly Punch, Rhinestone Jewels

Included in the kit:


1 - Wisteria Wonder card base
1 - Whisper White card front
1 - Daffodil Delight frame
1 - Whisper White large square
1 - Whisper White small square
1 - butterfly
3 - Rhinestone jewels
1 - Wisteria chevron ribbon

Stamp a row of Wisteria Wonder (or any light purple) dots on the bottom of the Whisper White card front. Attach the card front to the Wisteria Wonder card base.
Lay the Daffodil Delight frame on the large Whisper White square (DO NOT attach yet!). Stamp you sentiment onto the Whisper White card stock using Wisteria ink. Remove frame.
Stamp two sets of Wild Wasabi (or similar green) stems next to the sentiment.
Stamp flowers using Daffodil Delight (or any bright yellow).
Stamp an extra flower onto a scrap of Whisper White card stock and cut out. Attach with a Dimensional.
Using liquid glue, glue your frame onto your large square. You may need to trim the edges.
Using Dimensionals, attach the frame to the card front.
Place the rhinestones on the butterfly and add the butterfly with Dimensionals.
Tie the Wisteria ribbon and the twine.

And the final card in the kit:


Stamps: Painted Petals
Paper: Blackberry Bliss, Whisper White, Daffodil Delight, Painted Blooms DSP
Ink: Sahara Sand, Blackberry Bliss, Wild Wasabi
Accessories: Label Framelits, Spring Flowers EF, Blackberry Stitched Satin Ribbon, Wild Wasabi Twine, Daffodil Candy Dots, Festive Paper Piercing Template

The kit includes:

1 - Blackberry Bliss card base
1 - Spring Flower embossed Whisper White card front
1 - Daffodil Delight label
1 - Whisper White label
1 - strip of Painted Blooms DSP
3 - Daffodil Delight Candy Dots
1 - Blackberry Bliss ribbon

Using liquid glue (it works best on embossed paper), attach the Whisper White card front onto the Blackberry Bliss card base.
Again using liquid glue, attach the Painted Blooms DSP strip onto the embossed card front.
If you have the correct paper piercing template, pierce the Daffodil Delight label. If not, this step can be eliminated.
Stamp the gingham pattern onto the white label using Sahara Sand ink.


Stamp sentiment with Blackberry Bliss (or any dark purple) ink.
Stamp leaves using Wild Wasabi ink.
Stamp flowers with Blackberry Bliss.
Using Dimensionals, attach Whisper White label onto the Daffodil Delight label.
Again with Dimensionals, adhere Daffodil label onto card front. (You will have two layers of Dimensionals.)
Add Candy Dots to flower centers.
Tie ribbon and twine. The twine is double wrapped and tied with a bow instead of my usual knot. :)

So there you have it!! All four cards from the April Painted Petals Online Stamp Class. I would love it if you would join my May Class. Details can be found on my blog here:


If you are undecided about purchasing the Butterfly Bundle, visit my Pinterest board and see all the wonderful projects created with this beautiful set:

And don't forget, the new catalog is coming soon so you want to male sure and make your "Last Chance" purchases ASAP. I stocked up on Chevron Ribbon. I'm going to miss it, but am excited to start creating with all the new embellishments!!

Thanks for stopping by!
I hope to see you again soon.
Stamp Something!
Krystal

Tuesday, May 5, 2015

Stampin' Up! Painted Petals Delightful Wild Rose

Hey Stampin' Friends!!

For today's post I have two cards from my April Painted Petals Online Class. I am loving my online classes!! I hope you will join sometime.


Stamps: Painted Petals
Paper: Whisper White, Rose Red, Painted Blooms DSP, Color Collections DSP
Ink: Rose Red, Wild Wasabi
Accessories: Circle Punches, Elegant Butterfly Punch, Itty Bitty Accents Punch, Painted Blooms Twine, Decorative Dots EF, Rhinestone Jewels, Rose Red Grosgrain Ribbon (retired)


These are the circle punches I used:
2 1/2" Wild Wasabi
2" Whisper White
1 3/4" Rose Red


Kit includes:
1 - Whisper White card base
1 - Rose Red card front
1 - Painted Blooms DSP card front
1 - Wild Wasabi circle
1 - Whisper White circle
1 - Rose Red circle
1 - Daffodil Delight butterfly
3 - Itty Bitty flowers
6 - Rhinestones
1 - Rose Red ribbon

Notice I did not include the Wasabi twine, since that was something you were supposed to purchase for the class.

This card is fairly simple to create. Attach your card fronts to the card base. 
Stamp your flower stems using Wild Wasabi ink or any green you have. 
Stamp the tulips and sentiment in Rose Red or any pink ink you have. 
Layer your circles on the card. The circle with the sentiment is attached with Dimensionals. 
Add rhinestones to your butterfly and flowers. 
Attach all pieces using Dimensionals. 
Tie your ribbon and twine and you're done!!

I love how simple and colorful this card is. And it is easy to replicate with other colors and sentiments. It would be a great layout for a birthday card.

Here is the second card in the kit:


Stamps: Painted Petals
Paper: Rose Red, Wild Wasabi, Whisper White, Painted Blooms DSP
Ink: Rose Red, Wild Wasabi, Blushing Bride, Blackberry Bliss
Accessories: Paper Doily, Circle Framelits, Circle Punch, Artisan Embellishment (Rose Red Lace), Organza Ribbon, Painted Blooms Twine, Pearl Jewels

Kit includes:

1 - Rose Red card base
1 - Wild Wasabi card front
1 - Painted Blooms DSP car front
1 - Rose Red circle
1 - Paper Doily
1 - Whisper White circle
1 - Whisper White small circle
1 - Organza ribbon
1 - Rose Red lace
3 - Pearl jewels

Layer your card fronts onto your Rose Red card base. 
Attach the Rose Red circle BEHIND the Paper Doily. Stamp your flower wreath. 

Here is the steps I used while creating my wreath:

Stamp Rose Red flowers:


Stamp Blushing Bride flowers:


Stamp Blackberry Bliss flowers:


Stamp Wild Wasabi leaves:


Remember, if you do not have these exact inks, use something similar.

Next, you will stamp three more Rose Red flowers onto a piece of Whisper White cardstock and cut them out:


Attach cut-out flowers to your wreath using Dimensionals:


Trim excess card stock:

Using Dimensionals, attach flower wreath to the paper doily. 
Stamp sentiment using Blackberry Bliss ink onto the small circle. 
Attach sentiment to the center of the flower wreath using Dimensionals. 
Add Pearl jewels to Blushing Bride flowers.

Tie Organza ribbon. Attach Rose Red lace using Glue Dots. If you have the Painted Blooms twine, attach two loops under the flower wreath using Glue Dots.

This card did not turn out how I imagined. But I grew to like it. So I kept it. It showcases a different way to use your Painted Petals stamp set. And that's always a fun thing.

Tomorrow I will share the next two cards in the Painted Petals card kit. 

If you are interested in joining my May Online Stamp Class and receiving FREE card kits in the mail from me, please visit this link:


Thanks so much for stopping by!!
Remember to "like" my Facebook page for up-to-date stamping news and fun:

Stamp Something!
Krystal

Friday, April 24, 2015

Stampin' Up! Basic Butterfly Swap CASE

Hi Stamping Friends!!

Tomorrow I will be participating in my first ever card swap and I'm pretty excited!! I've never actually attended any type of crafting event where there was a swap. So even though I've been a Stampin' Up! demonstrator for almost 10 years, I'm still a newbie at some things. ;)


Stamps: Butterfly Basics
Paper: Pear Pizzazz, Wisteria Wonder, Naturals, Whisper White, Blushing Bride
Ink: Pear Pizzazz, Wisteria Wonder, Blushing Bride, Baked Brown Sugar, Blackberry Bliss marker
Accessories: Butterflies Thinlits, Wisteria Chevron Ribbon, Artisan Embellishment Kit (ribbon rose), Dotted Scallop Border punch, Linen Thread, Dimensionals

I CASEd this card from one I saw on the internet. And this was my prototype card. Which means I still made some changes before I made all 10 of my swaps. I eliminated most of the Blackberry Bliss and replaced it with Wisteria Wonder. I also did not include the smaller butterfly. Not major changes, but card making is always a process for me. I may look at a card for a week and still tweak it a bit before I am satisfied.

There is a lot of stamping on this card. I did it all in steps. Here are a couple of pictures:


In order to get the sentiment in the right location, I had to stamp my flower and fern image first.

On the flower, I inked the image up with Wisteria Wonder and then colored a few spots on the stamp with the Blackberry Bliss marker before I stamped it. Giving it a kind of two-tone effect.


Here is all the stamps and ink I used to create this card:


I designed this card before "The List" came out, but there are a few retirement items on it: Dotted Scallop Border Punch, Wisteria Wonder Chevron Ribbon, Blushing Bride card stock. Make sure you order everything you want from "The List" early as quantities are limited.

Here is all my parts and pieces ready for assembling:


You can see in this picture that I changes the butterfly from Blackberry to Wisteria. I wanted him to match the ribbon better. I could have chosen to change the ribbon color, but I just LOVE the chevron ribbon. I'm hoping to order some more. It's 50% off so I better hurry!

Here are all 10 cards all most finished. Just need ribbons and butterflies:


I'm looking forward to tomorrow's crafting event. It is a fundraiser for the Vista Pregnancy Resource Center. I just have NO idea what I am going to make for 12 whole hours!!

I made a little Stampin' Up! donation gift basket for a door prize. It had three stamps sets, a pack of 12x12 DSP, Rhinestones, Dimensionals, Ribbons, Buttons, cards made by me, and a few other odds and ends:


I hope the recipient enjoys it!!

Don't forget that today is THE LAST DAY to join my April Painted Petals Online Stamp Class:


You can find out all of the details on this post: PAINTED PETALS APRIL ONLINE CLASS

And don't forget to place your Last Chance List order ASAP:


And if you've already joined my April Online Class, but want to order some retiring products, you can combine that with my May Butterfly Bundle Class:


Visit this post for more details: BUTTERFLY BUNDLE MAY ONLINE CLASS

And as always... Make sure you go "like" my Facebook page. It's where I hang out most often and where you can find out the latest Stampin' Up! news and information first. And we just have a lot of fun together!!


Thanks for stopping by!
Stamp something!
Krystal


Tuesday, April 21, 2015

Stampin' Up! Last Chance List and New Weekly Deals

Hey Stampin' Friends!!


The Stampin' Up Retirement List has been posted!!! And there are tons of fabulous products and up to 50% off!!!! Lots of Big Shot items on the list this year which makes me super excited to see what new stuff is coming soon!!


Here is the link: LAST CHANCE RETIRED LIST


Things to remember:

*Accessories, Embellishments, and Tools are sold WHILE QUANTITIES LAST!!
*Stamp sets will be produced until May 20th and then they too will be WHILE SUPPLIES LAST!!
*Moral of this story? ORDER ASAP!!
*And because everyone is trying to order ASAP... The Stampin' Up! website may be sluggish. So be patient. 
*If you need any help or have any questions, please email or text me.


While you are purchasing all those retiring products that you "need", remember there is still time to join my April AND May Online stamp classes!!


Details for April's class can be found here: APRIL - PAINTED PETALS


Details for May's class can be found here: MAY - BUTTERFLY BUNDLE

If you would like to join both classes, just use either Hostess Code. The deadline for April's class is this Friday.

And it's Tuesday today which means...
NEW WEEKLY DEALS!!


WOW!! That's a whole lotta savings for one week!! Be sure to visit my online store ASAP to place your orders.

Hope your week is going well.
Stamp something!!!
Krystal

Thursday, April 9, 2015

Stampin' Up! Painted Petals 1 Card 4 DSPs

Hey Stampin' Friends!!

Every month I make and send out a large amount of thank you cards. This month it's even more than usual because I decided to send a little thank you gift to all of my Sale-A-Bration customers. Because I {heart} them!!

Anyway, this month I need 50 thank you cards. When making that large of an amount, I try and keep things as simple as possible, while still adding a little "wow" factor like ribbon and/or texture. Here is my design for this month:


Stamps: Painted Petals
Paper: Whisper White, Pistachio Pudding, Painted Blooms DSP
Ink: Daffodil Delight, Garden Green, Pacific Point
Accessories" Spring Flowers EF, Ornate Tag Topper Punch, Crushed Curry Baker's Twine, Pacific Point Stitched Grosgrain Ribbon (retired)

When making this many cards, I usually have to use different DSPs because I don't have enough of just one. So here is the same card with four different Designer Series Paper patterns:


The other Designer Series Paper patterns come from the All Abloom paper stack. It's fun to see how each pattern changes the look of the card. I love this Painted Petals image and sentiment. And since they are photopolymer, it makes placement so easy. I stamped 50 of these tags in no time. The size of the tag before I punched the Ornate Topper was 4" x 2".

Here are the cards all lined up in a row:


If you haven't bought the Painted Petals stamp set yet, there is still time to join my April Online Stamp Class.


When You purchase the Painted Petals stamp set and the Painted Bloom Twine, I will mail you a FREE exclusive card kit from me featuring the Painted Petals set. Visit this blog post to find out more details and also how to receive the kit even if you already have the Painted Petals set: APRIL ONLINE STAMP CLASS.

And this week is the perfect week to place your Online Stamp Class order because through Friday, Stampin' Up is offering FREE SHIPPING!!!


(I don't know who created this awesome graphic, but it is my favorite!!!)

For up-to-the-minute stamping fun and information, be sure to go "like" my Stampin' Up! Facebook page: KRYSTAL'S CARDS - STAMPIN' UP DEMONSTRATOR - OCEANSIDE

And while you are there, don't forget to enter the FREE GIVEAWAY. Details are in the above link for the Painted Petals Online Stamp Class. Today is the LAST DAY to get your name put in the drawing for FREE Stampin' Up! products!!

Thanks so much for stopping by!
STAMP SOMETHING!
Krystal

Wednesday, April 8, 2015

Do More of What Makes You Happy!!!

Hey Stampin' Friends!!

What is your favorite thing to stamp? I'm definitely a card girl. I started off as a die-hard scrapbooker. I switched to cards because they are faster and easier. I'll scrapbook again someday when I have more time (and less kids in the house). ;) Right now I spend about half of my life in the car driving my kids from school to practice to games to friends. You know the drill.

I know some stampers who create amazing 3-D items and treat holders. I always think I'm going to, but then I forget. I've also made a few seasonal home decor items as well. I love to take them out at holidays. Today's creation is something I get to leave out year-round.

This is the "after" photo:


Stamps: Flower Patch
Paper: Blushing Bride, Crisp Cantaloupe, Calypso Coral, Garden Green
Accessories: Blossom Punch, Pansy Punch, Petite Petals Punch, Boho Blossoms Punch, Flower Fair Framelits (leaves), Calypso Baker's Twine, Buttons & Brads (retired)

Here is what the frame looked like "before":


I loved the saying for my craft loft, but wasn't in love with the cardboard flowers. So I decided to buy it and give it some Stampin' Up! style!

To make the large paper flowers, I punched out two of each flower: Blossom, Pansy, and Petite Petals. Then I squished them all up into little "balls". 


After flattening them out, I sponged the edges of each flower using the coordinating ink. Then I layered the flowers: 2 Blossom, 2 Pansy, 2 Petite Petals and attached all the layers with a brad. I used my paper piercer to poke one hole through all the layers. To make the smaller flowers, just eliminate the larger punches.

The leaves were created with the Flower Patch stamp set and matching Flower Fair Framelits. The Flower Fair Framelits are on sale this week for only $18.71. Check out the Weekly Deals promotion on my website to order.

The hardest part about this project was trying to cover up the cardboard thing underneath. I ended up sponging some Garden Green ink over the whole thing so it would sort of blend into the background. 

I love how it all turned out. I need to keep my eyes open for more home decor items I can give some Stampin' Up! style to. :)

Yesterday I announced my April Online Stamp Class featuring the Painted Petals stamp set.


If you are interested in getting a FREE card kit from me, make sure you join by April 24th. Visit this blog post for more details: PAINTED PETALS

If you are undecided about joining the class, visit my Painted Petals Pinterest board to see lots of lovely creations made with this set. A little enabling always helps!! ;)

And this week is the perfect week to order the Painted Petals set because Stampin' Up! is offering FREE SHIPPING through April 10th!!


And in celebration of my 200 Facebook followers I'm doing a GIVEAWAY on my Facebook page. 
2. "Like" my page if you haven't already.
3. Find the post that says: LEAVE A COMMENT
4. Leave a comment by Thursday
I will choose a winner on Friday. Super easy!! I hope you will play along!!

I should get stamping. I have 50 thank you cards that need to be finished, addresses, and mailed. I love my job!!

Thanks for stopping by!
Stamp Something!
Krystal